Welcome back, readers and fans. Last time, I told you about the wonderful website known as Project Wonderful (yes, I meant to say that twice). You can advertise your site on there like your comic or webcomic if you have a little money to spend. You can also make money on Project Wonderful by becoming a publisher and hosting their ads on your site.
But what if you’re on a shoestring budget and can’t afford to pay for advertising? Well, you’re in luck, readers. I can show you how to get free advertising on Project Wonderful. That’s right, I said FREE! So how does that work?
There are a few limitations on that as I’m about to discuss. I also cannot claim original credit for this technique; it came to me from the Webcomic Police site. I also have screenshots to demonstrate what to do. So let’s get on, shall we?
First, you’ll need to join Project Wonderful by signing up. Go ahead and do it; it is free!
You will also need to make banners to advertise whatever site it is you want to promote. Don’t fret about that. It’s easy to do with any graphics program. They have guidelines about what these images should look like. You can even get ad templates straight from Project Wonderful to use!
Did you do all that? I’ll wait. When you have, keep reading.
Select “search for new places to bid” under the advertising tab. You should come to a screen pictured like the one below.
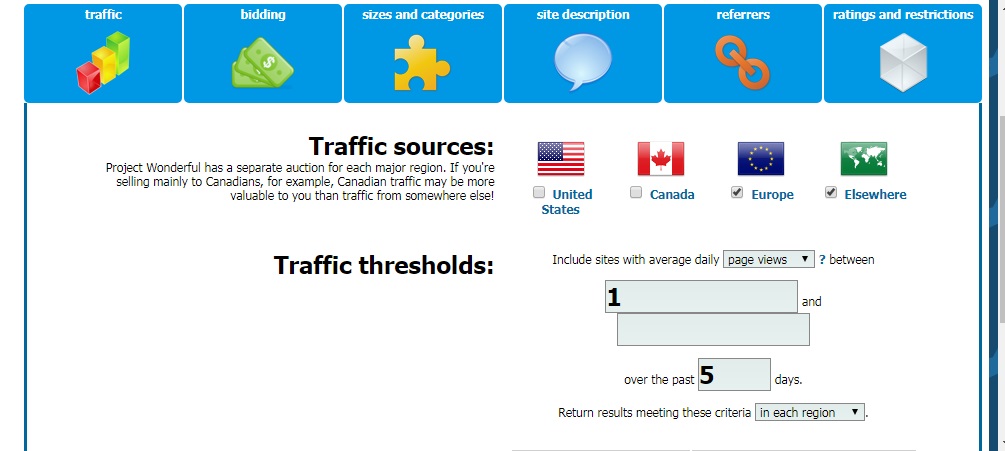
Only make sure the “Europe” and “Elsewhere” box are checked. Competition for advertising (both free and paid) are very competitive for both the United States and Canada, but it’s easier to get free ads in Europe (United Kingdom, France, Italy, Poland, etc) and Elsewhere (which covers every place else like Japan, Australia, Vietnam, Chile and so on). Also make sure “in each region” is selected under the return results. Next, click the bidding tab above in the search criteria.
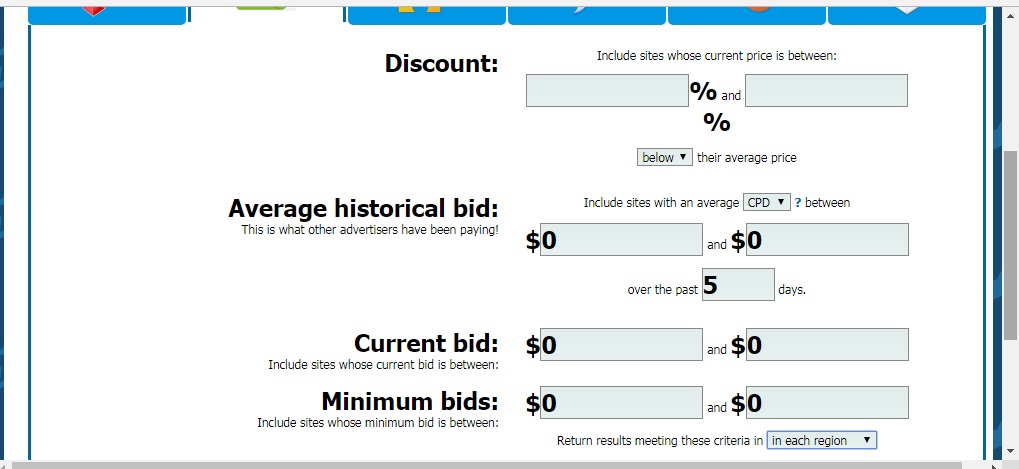
Enter “0” under all the boxes for average historical bid, current bid and minimum bids and also choose “in each region” as before. Move onto the sizes & categories tab next.
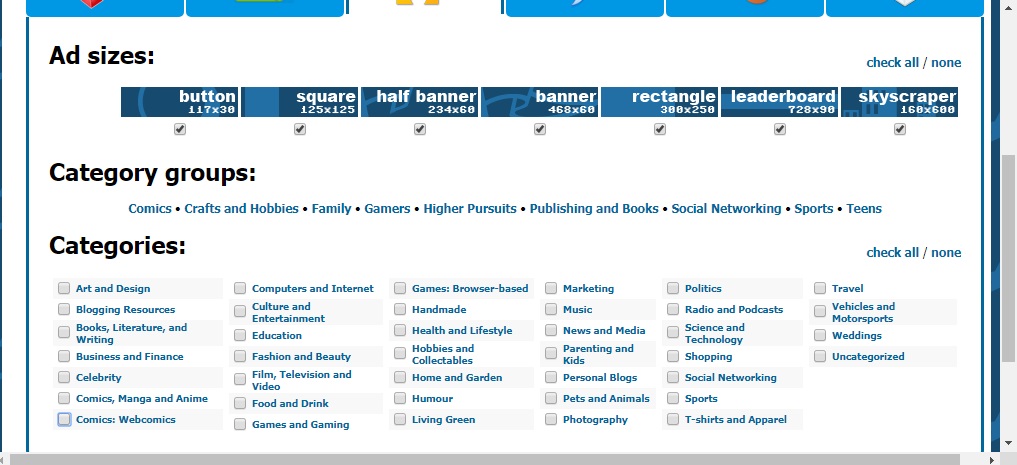
Check whatever sizes of ads you have prepared. Of course, if you have ads of all sizes, then check them all. Choose the category depending on what you have – if you have comics, choose “comics, manga and anime”, and if you have webcomics, choose “comics: webcomics”. Of course, there’s nothing stopping you from choosing the other categories. Lastly, ignore the tabs labelled site description and referrers. Move to the ratings & restrictions tab.
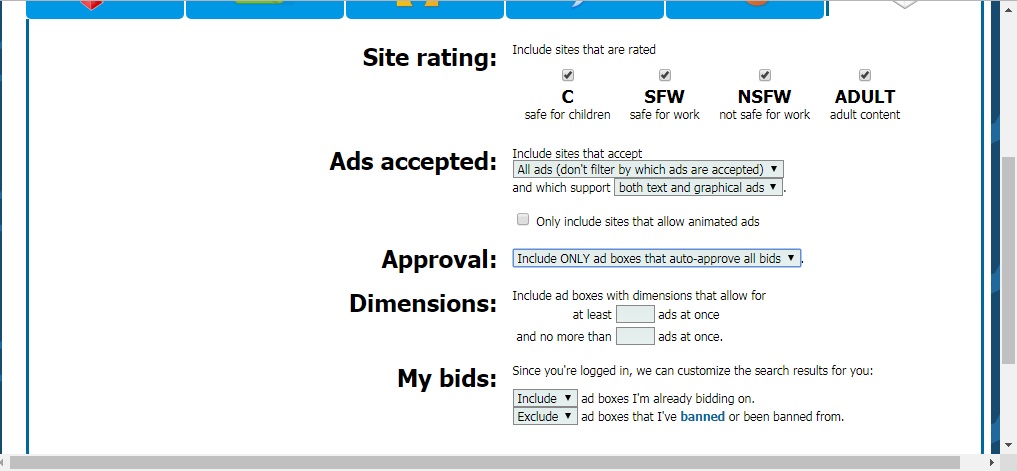
Choose the site ratings you want; it’s entirely up to you and it may depend on things like your own tastes or what you think your audience may be. Be very sure to choose the auto-approve option under the approval selections; that makes sure your ads are speedily on the site. When all that is done, use the search button and you’ll turn up whatever results you listed in your criteria.
To bid on a site, click on “place bid” which should be on the far right of the site results. You’ll come to a screen with information about the site you’d advertise on, such as a description, keywords, ad box displays, bids and its traffic. Those can be handy but what you’ll really want is the “place your bid” option.
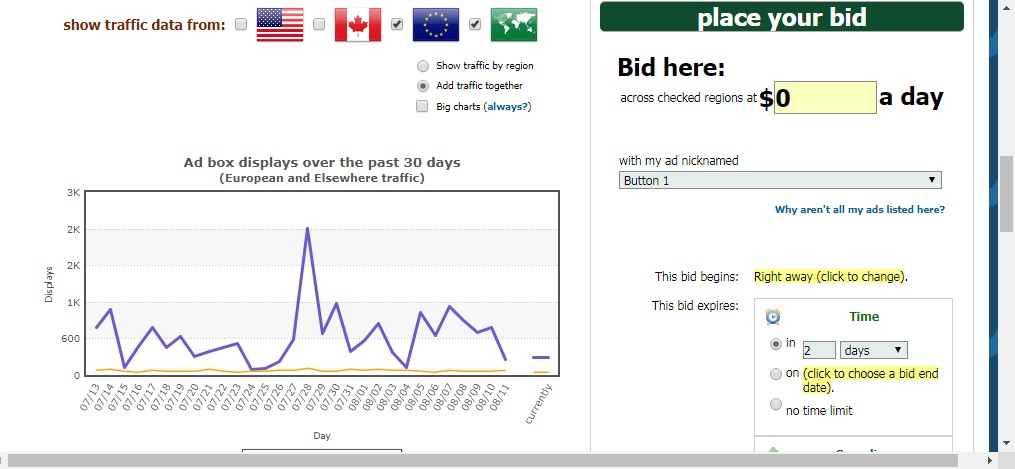
Enter “0” again under the “bid here” option and for the expiration date, enter “2” under days. Then just confirm your bid and you’re done.
You will either get a message saying you are the high bidder or you were outbid. These will change constantly on the site as one moment, you may be the winning bidder and another moment, you are not.
Now just repeat the above steps over and over until you get an error message saying you are at the maximum number of free bids, which is usually 200. Just spend 10-15 minutes every 2 days doing this over and over; you’ll rack up some traffic at least and it won’t cost you a penny.
That’s it for now. Until next time!
